If you’ve been using a microwave kiln — a small, kiln-wash-lined ceramic container that sits inside a standard household microwave and harnesses its magnetron energy to fuse glass — you already understand the fundamental idea: heat glass to the right temperature, the pieces bond, cool them slowly so the glass doesn’t crack from internal stress. That slow, controlled cooling process is called annealing, and it’s the single biggest thing a microwave kiln struggles to deliver reliably. The interior of a microwave kiln cools fast and unevenly because you simply open the door and set it on a trivet. For small pendants and cabochons, you can get away with it. For anything larger, more complex, or destined for resale, you’re gambling with every piece. A dedicated glass fusing kiln gives you a programmable controller, consistent heat distribution, and the ability to hold and descend through precise temperature ranges — which is what separates a studio tool from a workaround.
This article is written for the artist who’s already decided to upgrade and is now staring at a spreadsheet trying to choose between a $900 entry-level kiln and a $2,800 mid-range unit — and wondering whether the math actually justifies it. We’ll cover shelf setup, how to read and build an annealing schedule, and how to calculate your true cost per firing so you can defend the purchase to yourself (or a business partner).
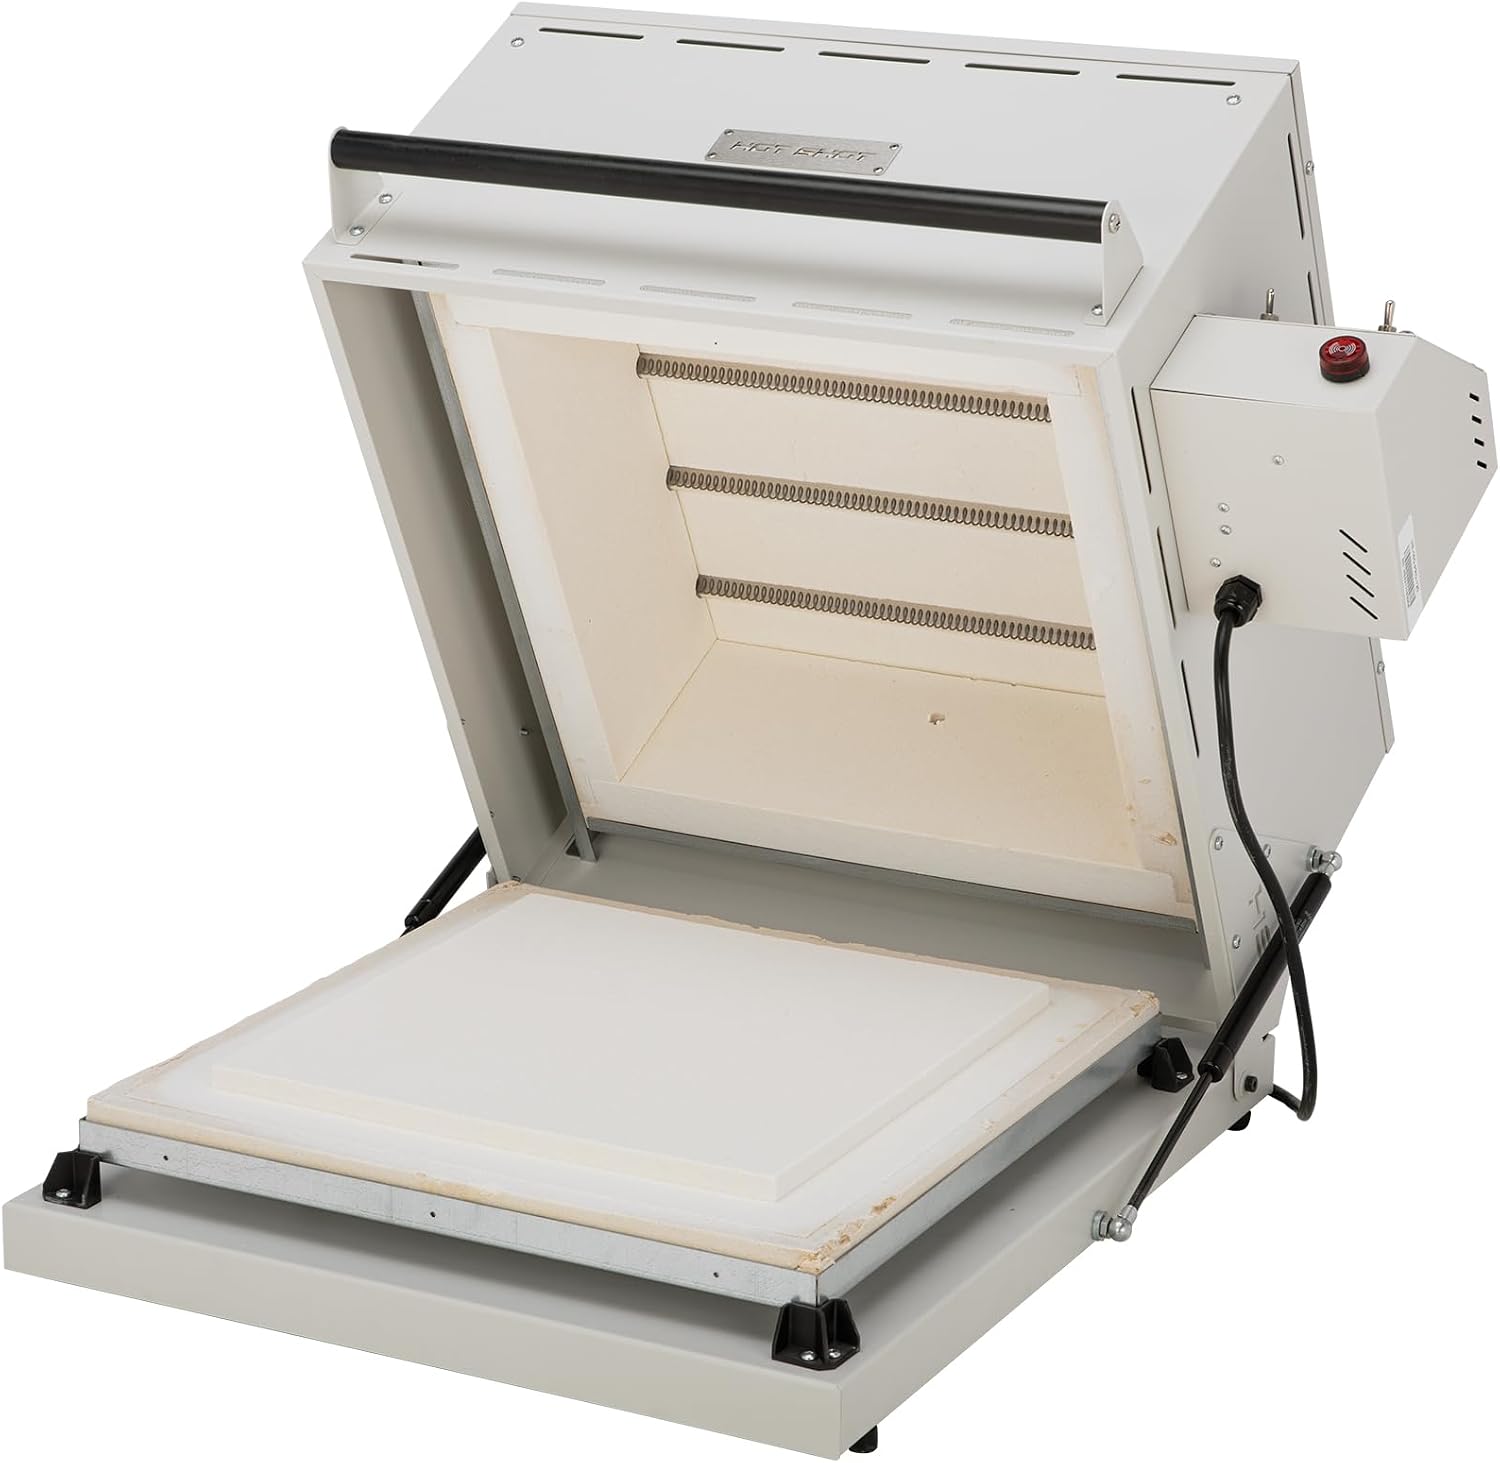
Why Your Shelf Setup Is the Foundation of Every Firing
Before you ever write a firing schedule, you need your kiln shelf configured correctly — because poor shelf setup is responsible for a surprising percentage of cracked or distorted pieces that artists mistakenly blame on their schedules.
Kiln wash is a refractory coating (typically alumina hydrate or a commercial blend) that you brush onto kiln shelves and kiln furniture. It prevents fused glass from permanently bonding to the shelf surface. Per Ceramic Arts Network’s “Glass Fusing Basics: Kilns, Schedules, and Glass” overview, you should apply three to five thin, brushed coats, letting each dry before the next, and re-apply whenever the wash shows cracks, peeling, or bare spots. Running a firing on a compromised shelf is how you destroy a piece and potentially a shelf simultaneously.
Shelf posts hold your shelf off the kiln floor, which matters for two reasons: airflow and element protection. In most top-loading fusing kilns, the elements run along the side walls and sometimes the lid. Elevating the shelf slightly — typically one to two inches off the floor on short posts — ensures heat circulates under the work as well as above it, which is especially important during the cooling phases of an anneal cycle. Glass Campus’s kiln selection guide notes that uneven bottom heat during annealing is one of the primary causes of residual stress in thicker pieces.
Fiber paper (thin sheets of refractory ceramic fiber, usually 1/16” to 1/8” thick) sits between your kiln wash and the glass. For fusing, a single layer of fiber paper lets you skip re-washing the shelf as frequently, because the paper takes the release duty. It’s also the correct substrate for slumping molds placed directly on the shelf. Replace fiber paper when it starts to crumble or shows glass bonding.
A workable entry-level shelf kit for a kiln in the 8”–14” interior diameter range typically runs $40–$80 for posts, a half-shelf, and a small bag of kiln wash. Don’t improvise with pottery shelves if you can avoid it — standard pottery shelves are heavier and thicker, and in a small fusing kiln they act as a heat sink that throws off your ramp rates.
Reading and Building an Annealing Schedule
A firing schedule (also called a firing program) is a series of instructions you enter into your kiln’s digital controller. Each step tells the kiln: ramp to this temperature at this rate, hold there for this many minutes, then proceed to the next step. The controller — on kilns like the Skutt GM series it’s called the GlassMaster, while Paragon’s fusing-dedicated units run a version of their Sentry Xpress — executes those instructions automatically.
A standard full-fuse schedule for compatible COE 96 or COE 90 glass (COE stands for coefficient of thermal expansion, a measure of how much a glass expands and contracts with heat — glasses of different COEs cannot be fused together without cracking) has roughly four phases:
- Initial ramp — slow climb from room temperature through the thermal shock danger zone (~1,000°F), typically 300–500°F per hour.
- Process ramp — faster climb to full-fuse temperature, usually 1,450°F–1,490°F for COE 96, where glass flows and surfaces become glossy.
- Process hold — 10–20 minutes at peak to allow full flow and bubble release.
- Annealing descent — the most critical phase. Drop to the annealing soak temperature (~960°F for Bullseye COE 90, ~950°F for Wissmach COE 96 equivalents), hold for 30–60 minutes, then ramp down slowly — typically no faster than 50–100°F per hour — through the strain point (~800°F) before allowing a free cool.
Per Bullseye Glass Co.’s technical library document “Annealing Thick Slabs,” the required annealing hold time and descent rate scale dramatically with glass thickness. A 6mm piece (two layers of 3mm sheet glass) might need a 30-minute soak and a 50°F/hour descent through the strain point. A 12mm piece needs 60 minutes or more and a slower descent of 25°F/hour. Skipping or rushing the anneal is not a shortcut — it’s a delayed crack, sometimes appearing hours or days after the piece leaves the kiln.
Most entry-level fusing kilns ship with factory preset programs. Use them as your starting point, not your permanent solution. As you log firings and note results — surface texture, bubble trapping, distortion — you’ll adjust segment by segment. Keep a physical or digital firing log; it’s the fastest way to build intuition.
The True Per-Firing Cost: Show the Math
This is the calculation most artists skip, and it’s the one that most clearly justifies a mid-range kiln over repeated microwave kiln replacement cycles.
By the numbers — illustrative cost comparison (2026 market):
| Microwave Kiln Setup | Entry Dedicated (e.g., Skutt GM8) | Mid-Range Dedicated (e.g., Paragon FireFly 16) | |
|---|---|---|---|
| Purchase price | ~$50–$150 | ~$900–$1,200 | ~$2,200–$2,800 |
| Usable interior area | ~20 sq in | ~50 sq in | ~113 sq in |
| Avg. electricity/firing | ~$0.10–$0.20 | ~$0.50–$0.90 | ~$1.10–$1.80 |
| Element replacement (est. per firing amortized) | N/A | ~$0.15–$0.25 | ~$0.20–$0.35 |
| Kiln wash + fiber paper per firing | ~$0.20 | ~$0.15 | ~$0.18 |
| Estimated consumables + energy per firing | $0.30–$0.40 | $0.80–$1.30 | $1.50–$2.33 |
Electricity cost is the most variable line. To calculate yours: find your kiln’s wattage rating (a Skutt GM8 draws approximately 1,440 watts; a Paragon FireFly 16 draws approximately 2,600 watts, per their respective published spec sheets). Divide by 1,000 to get kilowatts. Multiply by average firing duration in hours. Multiply by your local rate per kWh. The U.S. residential average in early 2026 sits around $0.16–$0.18/kWh (per U.S. Energy Information Administration published rate data), though studio-rate commercial electricity in some regions runs lower.
The number that changes the calculation most: production capacity per firing. A microwave kiln produces one to two small pendants per cycle. A dedicated 8” kiln produces six to twelve, depending on piece size. A 16” kiln can accommodate a full production batch — 20 to 30 cabochons, or four to six larger fused panels. When you divide your fixed per-firing overhead across a larger batch, the effective cost per piece drops substantially. Per Glass Campus’s kiln selection guide, artists producing for wholesale or consignment typically find that the break-even point on a mid-range fusing kiln arrives within 18 to 30 months at moderate production volume.
Element replacement is the other cost most buyers miss. Kiln elements — the coiled wire heating elements inside the kiln — degrade with use and eventually need replacement. Skutt and Paragon both publish replacement element kits for their fusing kilns, and the replacement process is documented in their respective owner manuals as a user-serviceable task (though comfort with basic electrical work is assumed). Amortized across a realistically projected element lifespan of 200–400 firings, the per-firing cost is modest but real.
The Decision Rule: Which Kiln Tier Actually Fits Your Situation
Here’s the “if X, then Y” framework, because the right answer genuinely depends on what you’re making and how much:
If you’re producing primarily small jewelry — pendants, earrings, cabochons under 2” — and firing fewer than 4 times per week, a quality entry-level dedicated fusing kiln in the $900–$1,400 range covers you. Models like the Skutt GM8 or the Paragon FireFly 8 are spec’d for this workload. The smaller interior diameter keeps electricity costs low, and the programmable controller gives you the annealing control you need. The tradeoff is that you can’t grow into larger panel work without purchasing again.
If you’re producing mixed work — some jewelry, some 6”–10” fused panels, some slumping — and firing regularly for sale or consignment, the $1,800–$2,800 mid-range is where the math works out. Kilns like the Paragon FireFly 16 or the Jen-Ken AF3P (Jen-Ken being a specialist fusing and glass kiln manufacturer with a long record among studio fusers) offer meaningfully more interior real estate, better lid and element geometry for even heat distribution, and controllers with enough memory to store the multiple programs a mixed practice requires. Per Ceramic Arts Network’s overview, the jump from an 8” to a 14”–16” interior is the single upgrade that most fundamentally changes what’s possible in a glass fusing practice.
If you’re a production studio or institutional buyer looking at panel work, architectural glass, or high-volume jewelry production, the $3,500–$6,000+ tier (Skutt’s larger GM units, Olympic kiln company’s glass-configured models, or a custom-spec L&L) adds the firing volume and element serviceability to support a commercial workload. That’s a separate analysis — but the per-firing cost math above scales directly: run the same calculation with your actual wattage, your local rate, and your projected batch size.
The microwave kiln served its purpose: it taught you that fusing works and that you like it. The dedicated kiln is where you learn to control it. The shelf setup and the annealing schedule are not obstacles between you and production — they are the practice. Getting them right is what makes the upgrade worth it.
For more on choosing between specific fusing kiln models by interior size and controller type, see our Glass Fusing Kiln Buyer’s Guide. If you’re evaluating electrical requirements before committing to a kiln model, our Kiln Amperage and Circuit Calculator walks through the numbers for your specific panel setup.