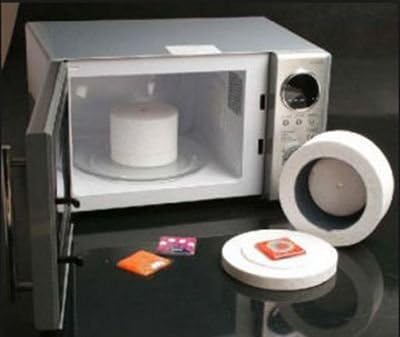
Glass fusing is the process of melting compatible pieces of glass together inside a kiln (a high-temperature oven designed for art materials) until they bond into a single, smooth object. It’s how pendant jewelry, small decorative tiles, and fused bowls are made. A microwave kiln takes that same idea and shrinks it down to something that fits inside your kitchen appliance: it’s a small ceramic-fiber chamber, roughly the size of a large coffee mug, that converts your microwave’s energy into intense radiant heat capable of softening and fusing small glass pieces in as little as two to four minutes. No special wiring, no dedicated studio space, no $1,500 investment — just a consumer microwave and a $30–$60 tool. If you’re evaluating whether a microwave kiln is a legitimate starting point or a toy that will frustrate you before you ever get to the real work, this guide gives you the honest decision framework.
The short answer: microwave kilns are a real, functional entry point for specific project types, and they have a hard ceiling that will matter to you sooner than you expect. Here’s exactly where that ceiling is, what the upgrade math looks like, and the “if X, then Y” rule for knowing when you’ve outgrown one.
What a Microwave Kiln Actually Does Well
The physics are straightforward. The kiln’s inner chamber is made from a silicon carbide–infused ceramic fiber that absorbs microwave radiation and re-radiates it as infrared heat — the same type of radiant heat a conventional kiln element produces, just generated by a completely different mechanism. Temperatures inside the chamber can reach roughly 1,500°F (815°C) under ideal conditions, which is sufficient for tack fusing (where glass softens and pieces bond but retain their original texture) and full fusing (where glass flows into a flat, unified sheet) at the small scale.
What actually works well:
- Pendant-scale jewelry: Pieces up to approximately 2 inches (5 cm) in diameter are the microwave kiln’s wheelhouse. Small dichroic cabochons, simple two-layer fused pendants, and basic inclusions between clear cap glass — these fire consistently at this scale. Paragon’s microwave kiln documentation notes that pieces should stay within the kiln’s inner firing surface, which is typically 3.5–4 inches across.
- Testing color combinations: Before committing a full kiln load of expensive art glass to a firing schedule, some intermediate fusers use a microwave kiln as a fast colorway test. Fire a small swatch in three minutes rather than waiting three hours for a conventional kiln cycle. This is arguably the best professional use case for a microwave kiln once you own a real kiln too.
- Sample tiles for product development: Small 2”×2” test tiles for pattern development, slumping preparation, or customer samples fire cleanly.
- Children’s programs and introductory workshops: Ceramic Arts Network’s glass fusing introduction guides acknowledge the microwave kiln as a reasonable demonstration tool precisely because it requires no hardwired 240V circuit and poses no unsupervised-heating risk in managed workshop settings.
The craft isn’t compromised at this scale. Owners consistently report clean fuses, acceptable surface quality, and genuinely usable finished pieces from pendants and small focal elements. If your production goal is 50 pendants a month for an Etsy-scale jewelry business, a microwave kiln gets you further than you might expect.
Where Microwave Kilns Break Down
This is where the decision math starts to matter. The limitations aren’t about quality — they’re about geometry, process control, and throughput. Understanding each one tells you which upgrade trigger applies to your situation.
Size ceiling is non-negotiable. The usable firing surface of most microwave kilns tops out around 4 inches in diameter. You cannot make a 6-inch fused plate, a slumped bowl blank, or any tile larger than a coaster. This isn’t a technique problem you can solve with experience — it’s a physical constraint of the chamber. Glass Campus’s COE compatibility resources note that uneven heat distribution in small chambers becomes a compounding problem as piece size increases, making thermal stress fractures more likely as you approach the chamber’s edges.
No programmable ramp-and-hold firing schedules. A conventional kiln controller (like Skutt’s Genesis or L&L’s DynaTrol) lets you program a firing schedule: ramp up at a controlled rate, hold at a specific temperature for a set duration, then cool at a controlled rate. This control is what separates a cleanly annealed piece (one cooled slowly enough that internal stress is relieved) from a piece that looks fine and then shatters two weeks later. A microwave kiln gives you one variable — time — and that’s it. You’re guessing at temperature; you have no thermocouple readout, no soak capability, and no controlled cool. Craft Council equipment guides consistently identify inadequate annealing as the primary failure mode in microwave-fused glass over time.
One piece per firing, with a mandatory cool-down. The chamber must cool between loads — typically 15–20 minutes minimum. At pendant scale that may be acceptable; the moment you’re trying to produce volume, it becomes the binding constraint.
Slumping is not reliably achievable. Slumping is the process of heating a fused glass blank over a mold so it droops into a bowl or dish shape. It requires a sustained temperature soak and a controlled environment. Microwave kilns cannot reliably sustain the hold temperatures required, and their internal geometry makes mold placement impractical for anything beyond the most rudimentary shallow forms.
By the Numbers
| Feature | Microwave Kiln | Entry Glass Kiln (e.g., Skutt GM 228) |
|---|---|---|
| Max firing surface | ~4 in diameter | 13.5 × 13.5 in |
| Temperature control | Time only (no readout) | Programmable, ±5°F |
| Annealing capability | Manual/approximate | Full ramp/hold/cool schedules |
| Price range (2026) | $30–$65 | $900–$1,400 |
| Electrical requirement | Standard 120V outlet | 120V (GM 228) or 240V depending on model |
When to Upgrade: The Decision Framework
The upgrade question isn’t “am I serious enough?” — it’s a straightforward function of what you’re trying to make and how often. Here’s the honest if/then structure:
If you’re making pendants and small focal elements and your volume is under 20–30 pieces per month, a microwave kiln is a financially defensible starting point. You’ll learn whether you like the medium without a significant capital commitment. Treat this phase as tuition, not as a permanent studio solution.
If you’ve broken more than two pieces to thermal shock or annealing failure, you’ve hit the process-control ceiling. Those aren’t technique errors you can skill your way out of — they’re the physics of an uncontrolled cool. At this point you’re destroying inventory, and the cost of losses will start to approach the cost of a real kiln faster than the math suggests.
If your project list includes anything wider than 4 inches — fused tiles, bowl blanks, nightlights, larger pendants, coasters — upgrade now. There is no workaround. The microwave kiln cannot produce those pieces.
If you’re running workshops or teaching, the microwave kiln’s value as a demonstration tool is real, but as a production tool for student output it creates inconsistent results that erode confidence. A small dedicated glass kiln at the $900–$1,400 entry tier gives you repeatable outcomes that actually teach good technique.
The upgrade crossover point: Based on published glass-blank and art glass sheet pricing in 2026, a modest production run of 40–50 fused pieces per month in the 4–6 inch range will typically generate enough material waste (from pieces lost to annealing failures and size constraints) to justify the cost of an entry glass kiln within 6–8 months. The Craft Council’s equipment guides suggest framing kiln purchases as capital with a 5–7 year service life; at that horizon, the cost per firing hour of a dedicated glass kiln is low enough that the microwave kiln’s only remaining advantage is portability.
What to Look for in Your First Real Glass Kiln
When you’re ready to step up, the entry-tier glass kiln market in 2026 offers purpose-built fusing kilns that don’t require you to buy a full ceramics kiln. A few parameters to anchor your search:
Front-loading vs. clamshell (top-hat) design. Clamshell kilns — where the lid lifts straight up — are the standard for glass fusing at the entry level. They provide even top-down radiant heat, and you can peek at the melt without introducing cold air across the bottom of the piece. Skutt’s glass-specific models and the Paragon Caldera are frequently cited in Glass Campus resources as well-regarded options in this format.
Controller quality matters immediately. The jump from a microwave kiln to a kiln with a programmable digital controller isn’t just about convenience — it’s what makes proper annealing possible. Look for a controller that allows you to program at minimum three segments: ramp rate, hold temperature and duration, and a controlled cool rate. The Genesis (Skutt) and the Sentry Xpress series (used on several Paragon models) both support this and are well-documented for glass-specific firing schedules.
Amps and circuit requirements. Many entry glass kilns — including small clamshell models in the 120V configuration — run on a standard 15 or 20-amp household circuit. Confirm the amperage draw before purchase if you’re working in a rented studio or a space where adding a 240V circuit isn’t feasible. Paragon’s published spec sheets and Skutt’s online documentation both list amperage and circuit requirements clearly for each model.
Interior dimensions and your target project size. A 13” × 13” interior surface lets you fire a single 12-inch plate blank or several smaller pieces in one load. That’s the practical minimum for moving beyond pendant scale. If you anticipate fusing larger architectural pieces or production tiles, look at models with 18”+ interior dimensions, which moves you into the $1,800–$2,500 range.
The Bottom Line
A microwave kiln is a legitimate tool with a specific, bounded use case: small-scale pendant and focal jewelry, colorway testing, and low-stakes exploration of whether glass fusing is a medium you want to invest in. It is not a stepping stone you can extend indefinitely — its ceiling is structural, not experiential.
If you’re already making pieces and hitting any of the size, annealing, or throughput limits described above, the decision to upgrade isn’t speculative. Run the loss math on your last 30 days of firing. If your material waste from failures plus the opportunity cost of pieces you can’t make yet exceeds $100–$150, you’re already funding a real kiln one broken pendant at a time.
The entry glass kiln market in 2026 is well-populated with purpose-built options in the $900–$1,400 range that require no special wiring and fit comfortably on a studio workbench. That’s the right next step — and it’s the point where the technique you’ve been building actually has room to develop.